Monday, 4 December 2017

Professional Practice: Shoot Day 2

Professional Practice: Shoot Day 2

Today was the second day of shooting, although I didn't initially think I would need a second shoot day, after showing the guildhall my rough cut they asked me to make a few changes that required re-shooting a few bits and getting some pickup shots. 

I had Alex helping me today, primarily as my sound operator but also as an assistant camera operator.

I had with me the revised version of my script so that I could re-record my PTC's as well as a few notes on the pickup shots I needed.  


To start the day we once again wheeled the cart outside, and while the weather conditions were fortunately very similar to the previous shoot day, I had to remember how the cart was placed. 
To overcome this difficulty I had some reference images as well as the rough cut saved to my phone and with Alex's help, we were able to position the cart as close to its original location as possible, helping maintain continuity. 

PTC's
Recording PTC's this time was actually easier since I had already learned the script and actually had less to say to the camera (since the guildhall wanted me to shorten the PTC's). 

I had Alex behind the camera to start with to check I was in focus but then he positioned himself closer to me with the tascam to get as clear audio as possible. 

I like to use manual focus which actually proved as an advantage when I had someone to help. While it was difficult to present and operate a camera at the same time, it is a skill I can take forward.  

I did takes of various length so that i could present the guildhall with different options later on.

Panning
Although most of my panning was done last time I made the mistake of recording some with the incorrect camera orientation. 

As such a re shot a few of the pans from new angles. 

Since I had now reccied the location twice and had shooting experience this proved to be easier the second time around. 

Time Lapses
In some of the commissions I looked at, they featured time lapses of museum visitors. While I wasn't sure if I needed this at first I realised I didn't have many cut aways to ease the initial transition in voice over, so upon Alex's suggestion, I finished my panning shots while he filmed a few time lapses, which upon review, turned out a lot better than expected.  

Other Shots
I continued to get a few more establishing shots since the ones I had, while good, weren't as effective as they could have been. 

Also when watching back my rough cut one thing I picked up on was the length of my POV shots and the lack of cuts. 

To remedy this I recorded some additional POV shots from slightly different angles that I could cut to. 


I also wanted to get a shot of the mechanism inside of the cart but last time found it too dark to prove as an effective shot. However this time I was able to overcome this problem by placing a light just in front of the mechanism to provide a well lit shot.

Overall today was very productive and I have multiple options for editing that will benefit both myself and the guildhall. 

Difficulties
The outside location proved to be quite noisy when recording PTC's but to overcome this we did multiple takes.
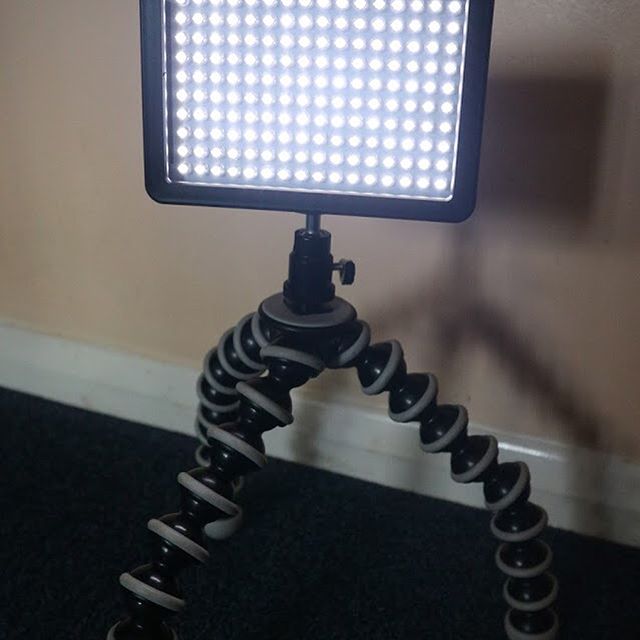
Some of the angles of the pump were darker than others and raising ISO would have made the shot too grainy. to overcome this I placed a light out of shot but kept the intensity low to maintain a natural look.

The location of the pump had to be re established. I could remember roughly the angel it was positioned at last time but to help me I had reference images to properly asses the space with and maintain continuity. 


Positives
My communication skills were effective today, Alex raised more questions than Mellissa and I effectively explained my creative vision.

I came away once again with more footage than initially planned.

I reviewed the footage far more frequently this time around and because of that I was able to quickly identify which shots were most effective and which needed to be re-shot. 

I stuck to my schedule far better the second time, probably since I had a clearer idea of what I needed.

Friday, 1 December 2017

Professional Practice: Shot Types

Professional Practice: Shot Types

As part of my ongoing research for this project, I have been looking in to various shot types and shooting styles used in commissions. This is a collation of what I have found. It is expanded upon from the research in my report.


Establishing Shots

One type of shot that was present in all of the commissions I looked at (including previous students work) was the Establishing Shot. Merriam Webster describes an establishing shot as “a usually long shot in film or video used at the beginning of a sequence to establish an overview of the scene that follows”. (Webster, 2015)

Bernard states “within any given scene you want establishing shots, wide shots, medium shots, close ups, and cut aways”. (Bernard, 2010, p. 177) I found establishing shots in particular to be key in showing the audience where the events are set and gives some kind of context. I use several establishing shots especially when starting a new point in the voice over.

The first establishing shot helps give context to the following Piece to camera by setting the location, I used the museum sign as Iconography so that you can get some context as to the location I am referring to.

The second use of establishing shots is used to show the Fire Pump in its entirety and helps to help remind the audience of the subject In addition to the establishing shots I followed Bernards advice by shooting several wide shots, since in the past I’ve needed to re-shoot a scene and have not had enough wide shots, as such I have learned to get good shot coverage.


Pans/Tracking Shots


When planning this commission I knew that there would be times when the younger target audience's attention might be reduced as they become slightly bombarded with information. As such I knew I had to keep the visuals of the shot interesting. Lynda.com refers to panning as a direct method of manipulating audience attention, stating “Panning can be used to follow a subject as it makes its way across the frame. Or it can be also used to redirect the viewer's attention to reveal new details”. (Angel, 2015) Meaning that we can see everything that is going on in a shot as if we ourselves were there following the action. I knew it was important to keep movement in the piece and had multiple panning methods.

The first was a traditional horizontal movement with the camera mounted on the tripod.
Then through looking at other commissions such as the Middelheim Museum promo, I noted that they blended tripod and handheld movement to make it feel like the video was constantly on the move. Picking up on this I used the fig rig to get closer than I could with a tripod moving along the object to direct audiences eye line.
My final method of panning/tracking was using my mini dolly. I know from research that low angle shots give the subject power so I used a series of low angle pans (from both the front and side to find the best option) to keep audiences in awe of the object and maintain attention.
The area I had to work with wasn’t ideal for this since the concrete ground was uneven and didn’t provide steady footing. However I overcame this by utilising the smooth planks and pillars around me as an anchor point.
Point Of View Shots (POV)
Another use of movement came thanks to the action cam and a gorilla pod. I was able to mount the camera on to the moving parts of the pump to create POV shots, as if the audience were actively engaged in its motion. Media Collage.com defines a POV shot as “A shot that shows a view from a certain perspective” (Collage, 2013).
Film graduate Christopher Kneller states that “emotional connection with a film can be engrossed with the use of P.O.V” (Kneller, 2013) which is one of the main reasons I decided to employ the technique. I wanted my audience to connect with the story and that is one method of doing so.
I received positive feedback about these shots and they seemed to do their job well.

Zoom Shots

Jackobs and Peacock write that “The zoom lens is the ideal tool to keep continuity, while keeping action on screen at all times” (Jason Jackobs, 2013).


I knew I wanted to maintain audience attention as previously mentioned by keeping the movement on screen. Zoom tools were another method of this. I used a larger lens on occasion in my project to allow for me to zoom in on particular focus points, or out to re-establish the subject. However, upon reflection I didn't utilize this technique as often as I could have done and as such had to manipulate some shots in post to create this effec
t.

Monday, 27 November 2017

Professional Practice: Revised Script

Professional Practice: Revised Script

Following my meeting with the guildhall and their viewing of my rough cut they asked me to make a few amendments to my script voice over.

They felt some parts such as the part where i mention the pump was "poorly maintained" and kept it "poor storage conditions" had unintended negative implications towards the museum. 

They also didn't like the phrase "at their peak" since it implied that the pump lost its effectiveness over time. 

As such I went back over my script and changed some of the language used to fit the guildhall's wishes. I fully understood their perspective on this and was happy to make these amendments. 

I also looked at some of the language I used in my script. Since according to the guildhall my primary audience will be primary school children, and my secondary audience will be other museum visitors (possibly teachers or history experts/enthusiasts). As such I need to keep my language universal. 

I made sure to read over my script to make sure it was easy to understand without over simplifying things. 

Bellow is the revised version of my script.


Friday, 24 November 2017

Professional Practice: Rough Cut Action Points

Professional Practice: Rough Cut Action Points

Bellow are a list of points that detail how and what I plan to act upon following the viewing of my Rough Cut:


    Bernard states that “The rough cut stage is often the best time to reassess the major issues of story and narrative”. (Bernard, 2010, p. 188), from teh feedback I received I certainly feel equiped to address such issues.
  • Split Screen- I see their point about the limited view in places, and as such I will cut back on it slightly, reducing it to two frames rather than three. I will consider removing it completely but I am quite impressed by it as were the focus group of peers I showed it to.


  • Revise Outro- Following their point about the ineffectiveness of shooting in to the light I will re- arrange a time to re-shoot a few short segments such as the outro (this may be a chance to get a few pick up shots where things like planks or time codes were visible in shot). I will also act upon their advice to add in an additional shot of the Fire pump to end on, followed by Text e.g. credits and logo's.

  • Revise Language- Now that I have a clearer idea of my primary and secondary audiences I will edit together a new draft of my script that might be a little easier to understand. I will also change up some of the tenses and language to remove accidental negative connotations about the pumps care.

  • Animation- Similarly to keep the attention of my younger audience I will finish working on my animated diagram, making sure to add in details of scale e.g. arrows vehicles etc. so it is can be easily understood. 

  • Revise PTC- Following their advice I will look at shortening the PTC shots so that we transition more directly in to the voice over. I would ideally still like to keep these shots though, as they inject personality in to the piece that helps it stand out. 
Fortunately all of these points are relatively easy to act upon, most can be covered in script changes and re recording of voice over, however some will require a re-shoot which I will scheduled for December 4th as we discussed in our first meeting.

Professional Practice: Rough Cut viewing

Professional Practice: Rough Cut viewing

Today I went to meet with the Guildhall once again, for this meeting I had prepared a rough cut of the project for them to see. This cut was a completed but unpolished version of the project, so although there were things I wanted to add or change there was plenty for them to feedback on. 

Going in to this interview I wasn't sure what to expect. Since neither Rachel or Steve were film makers I din't expect them to have much to comment in in regards to the stylistic aspects of my project. And although they had no technical knowledge, they had more to comment on visually than I was expecting. 

For example ti help this project stand out a little from other commissions I experimented with a split screen effect to give the audience the chance to look at multiple angles at the same time, and giving greater context to the voice over.

However, while they weren't against the idea, they didn't think that it was as effective as I intended. They said that some parts are a little distracting since you cant see the entire shot, and are left wanting more. They suggested I think about reducing its use.  

Another thing they had to comment on was the PTC shots. I included them as I thought they would add a little bit more energy and personality in to the piece (which they agreed worked) but they were concerned parts of it came of as cheesy and a little "antiques roadshow". They liked the energy it gave but suggested it should transition quicker/more directly in to the voice over.

They also pointed out a few things which I surprisingly missed in the edit, for example I was shooting in to the light in my outro which is not an effective angle, there was also a plank seen in one or two shots.

This part in particular was great to experience as in previous units I have struggled with criticism. However this time round I was not working with my peers I was working directly for a client and they had an agenda that they needed to stick to, and most importantly they hired me to work for them. This meant that to an extent I had to put some of my personal feelings aside and work on a solution or compromise with the guildhall. 

This was great for my personal development and helped me realize what it would be like to work with clients. 

They remained very professional watching the cut several times before commenting (which surprised me in a good way) and although Rachel was the primary client who I was to get feedback from, she would regularly refer me to Steve to make sure I remained factually accurate. 

The other main changes that we discussed were mainly to do with the voice over and the language I was using. We both admitted fault since they forgot to mention about the primary age of visitors the museum attracts and I forgot to ask. They forgot to mention that they get a lot of primary school trips to the museum and that they study the 100 objects in class. Steve also hosts talks for history enthusiasts. As such they suggested that some of my language should be a  little more universal so that it can easily be understood by everyone. 

They also brought up that one or two points i make had (unintentional) negative connotations about the pump and the museums care of it. 

This was a great learning experience as they brought up points that I would never have considered myself, and since they also have a clear idea of what the project needs to deliver we were able to share our knowledge in our respective fields to explore how we can tell the story we need to.

I will draw up a plan on how I intend to act on their feedback. 

Thursday, 23 November 2017

Professional Practice: Edit Process Part 1

Professional Practice: Edit Process Part 1

The editing for this commission has been an interesting experience. While not particularly challenging I have still learned a lot.

Video editing is “the process of combining video elements from various sources, into one coherent whole” (Thomas D Burrows, 2001). To do this the first step was to organise all the footage I had shot. Since I had a multi-camera set up (which proved to be a big advantage) I decided the best way would be to place all the footage in bins corresponding to the camera they were shot on. My Tascam audio would then go in a separate folder. 


I looked through each of my clips and decided which was most effective. After I had assessed this for every angle I placed them in my timeline. Once all the shots were ordered and in the timeline, I could begin to cut down on their length and see how many cuts I would need in my voice over. 

There are “Two basic edit processes that can be used in post production. Linear and Non-Linear editing”. (Thomas D Burrows, 2001, p. 182). Since I my commission was designed to inform but also keep the attention of museum visitors (who could potentially be quite young) I decided that even though I was shooting objects not people my best option would be to stick to linier editing as best as possible to acheive a coherant narrative. I also knew I had to keep it relatively short since FStoppers.com advises "With the shrinking attention span of most audiences, and all kinds of media fighting for your time on the internet, it’s often a good idea to keep your videos as short as possible" (FStoppers.com, 2014). The guildhall gave me a guideline of between 2 and 2 and a half minutes. 

My voice over was just under that so thought it best to use that as a guideline. This was the first time I had been editing footage to fit a voice over and not the other way around which was a new experience and upon reflection, was actually quite useful. 


I constantly had an audial reference of what should be displayed on screen and the pace of the audio helped me decide how many video cuts I needed. 


Although I was filming objects not people, the primary editing style used in this project was linear editing. 

I was concerned that this project wouldn't give me much of a chance to show off my skills as an editor. To overcome this I decided to utilise some of my creative skills in video manipulation, but keep it to a minimum. 

This led to the creation of a split screen effect which gives the viewer multiple viewing angles and keeps your attention with quick cuts. This received quite positive feedback when shown to my peers.

Caleb Ward writes "as an editor you are a storyteller" (Ward, 2015). I ensured that the project started with an establishing shot. Which then gently fades in to the next shot. Although the commissions I looked at primarily use cuts I found that fades help make a more gentle transition between wildly different shots.

I was able to use close up's often since the voice over aided the visuals and when talking generically I tended to cut to the pans, tracking shots and zooms. Focus pulls were great for revealing new information or when discussing a new part of the pump.

One difficulty I encountered was that some focus pulls were either missed or ineffective initially. As such I have had to re create/manipulate some in post. Also some shots featured a time code that I forgot to disable and proved quite distracting. To solve this I have been cropping and stabilizing said footage.

On the side I have been using both Adobe Illustrator and After effects to create a small animation which I hope to serve as a visual aid.


Overall the initial editing has not been that challenging but I have been able to expand my skills in after effects and illustrator. As well as experience what it is like to edit with someone else's aims in mind. 

Bibliogrpahy
Thomas D Burrows, L. S. G. J. C. F. D. N. W., (2001). Video Production Disiplins And Techniques. 8th ed. s.l.:s.n.

FStoppers.com, 2014. These 5 Video Editing Tricks Will Make Your Editing Faster and Your Videos 
More Enjoyable to Watch. [Online]
Available at: https://fstoppers.com/bts/these-5-video-editing-tricks-will-make-your-editing-faster-and-your-videos-more-50565
[Accessed 22 November 2017].

Ward, C., 2015. Professional Video Editing Tips And Techniques. [Online]
Available at: https://www.premiumbeat.com/blog/professional-video-editing-tips-and-techniques/
[Accessed 22 November 2017].

Tuesday, 21 November 2017

Professional Practice: Shoot Day 1

Professional Practice: Shoot Day 1

Today was the first day of shooting.I packed all the equipment on my equipment list and made sure I had both my script and storyboards ready to work from. I had Mellissa helping me today and arrived at the museum around 10:30 so that I could set up before Mellissa arrived.

Although Rachel herself was busy today I thought it best to make them aware I was here and maintain a professional persona. I headed for the reception desk and they called Steve who met with us and we went through all the details one last time. He then opened up doors to the courtyard for me and helped me move the Pump outside where it would benefit from space and natural light. 


Although I had a shot list to work from I also had a lot of creative control since I was working with objects as opposed to people. This meant I could adapt ideas as new opportunities presented themselves, I think adaptability is one of the most key skills you can have in the industry and I certainly worked on that here. Since the day was quite overcast and I was under shelter I had to adjust my ISO and white balance so as to bring out the object without over exposing or losing quality.


From my research in to other museum commissions, I knew which shots were used the most and which were the most ke
y.

I started by getting some establishing shots. When I reccied the location I noted down the sign as a great starting point. I got a few static shots as well as some pans. 

I also got a few wide shots of the pump before Mellissa arrived to help. 

In this shoot I acted as the presenter, the camera operator, and the director, which was a good learning experience. 

PTC's

Once Mellissa arrived I decided the most productive use of time would be to shoot the PTC's. I had Mellissa use the fig-rig to allow for easy handheld movement while maintaining a steady shot. We then used the Tripod for shots where I wasn't walking. It was useful to have Mellissa behind the camera as she could tell me how my framing was and if I was in focus, which would have been more difficult by myself. She was also a good listener. 


After the PTCS I got Mellissa to help me capture movement in my shots. While I set up the camera in various locations she stood out of shot and moved the pumps handles and other moving parts at various speeds to get the most accurate re-creation possible. 

Panning
When it came to panning I had various methods that I had looked in to. I started with simple Tripod movements, making sure to pan both vertically and horizontally to give me the most options in the edit.

Next, from my research I found that most camera operators often pan using a Dolly. As such, I was sure to bring my mini dolly and Action cam (go-pro) so that I could get a variety of unique shots. 

The space wasn't as ideal as I first noted as the ground was a bit uneven. however, I overcame this by utilising a plank used to roll the pump outside. I placed the Dolly on the plank and was able to get a variety of perfectly straight pans both from the side and from the front.


I was then able to take this one step further utilising my environment. Thanks to its size I was able to place the dolly on the surrounding pillars and adjust its tripod head to achieve some excellent vertical pans and tracking shots. 

POV Shots
The Action cam continued to come in useful as I was able to mount it to various parts of the cart using my gorilla pod. 

This combined with the movement of the cart made for some really unique angles and POV shots that I hope will draw in the viewer. This was actually something that was not in my shot list but on the day I found it would make a great shot.

Other Shots
I was sure to record multiple takes of each shot to give me the most options in the edit. 

I was sure to follow my shot list before venturing out to additional shots. I obtained wide shots, mid shots, and close-ups from different angles e.g. from the rear, looking at the wheels, paintwork etc. that would fit with my script. 

In order to keep the narrative on the move, I wanted to incorporate as much movement as possible to maintain audience attention. So even when the cart wasn't moving I made sure to either use a zoom lens or a focus pull to direct attention. 

To get the best sound possible I had a shotgun mic on top of my DSLR (mainly for atmos), as well as a tascam that I experimented with the location of to get the clearest dictation possible without having it in shot. 

To conclude the day we wheeled the cart back inside and I got a few shots of its home location to help bring a conclusion to the project. As well as getting Mellissa help me record a closing PTC

Difficulties

The day was quite overcast so I had to change the aperture and ISO on my camera to account for this.

The ground was uneven and wasn't ideal for pans, but I overcame this by using a plank and pillars to provide steady footing.


Line learning was not quite as easy as I expected but after a few takes I was able to recite the script smoothly.

The shotgun mic cut out towards the end but fortunately I had the Tascam as a backup. 


Positives

I got plenty of footage from a variety of angles so should have a lot to work with.

I was able to utilise the equipment to its full potential making effective use of the tascam (which i hadn't used before).

I communicated effectively with Mellissa and was able to share my creative vision.

I managed my various roles well, following my shot list and gaining additional shots.