Thursday 14 December 2017

Professional Practice: Closing Thoughts and Evaluation

Professional Practice: Closing Thoughts and Evaluation


Going in to this project I was quite open minded, although I initially had professional practice as my second choice I am glad I chose it. I wanted to experience what it would be like to work in a real-world professional environment either for a company or client. 

My choice to work for the Guildhall Museum was a very clear one. The opportunity they presented was one that allowed for great and unique story telling. I was able to create new content aimed at a specific audience. 

The initial process of communication was done well however it still presented one or two bumps. We arranged a meeting in which we were both able to make clear our aims for the project and put together a clear schedule. I was quite organised in this project and only developed my organisational skills further as the project progressed. However, there was some trouble early on when the Guildhall didn't receive some of my paperwork on time due to technical difficulties. However, my decision to include both a script and a story board helped them to understand and support my vision. 

One thing I did note is that I perhaps should have gone in to the meetings armed with more questions to ask them. Since although I had a rough idea of my target audience, the exact age range wasn't made clear until further down the line. This is something I probably should have raised earlier on. 

The shooting process went very well. Mainly thanks to my script, shoot schedule, storyboards and the creative freedom I had. I was able to achieve more than just my planned shots which meant I had a lot of footage and angles to work with, which really aided the storytelling. I also was able to carry forth many of the skills I had picked up on in previous units such as focus pulls, zooms, panning/tracking etc. While incorporating new skills like POV shots. 

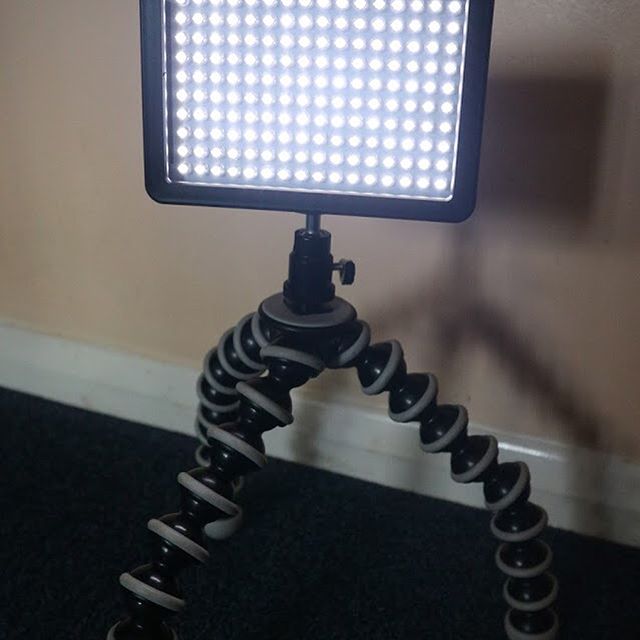
Working with different people was a good experience and helped me to develop my communication skills. Also, I was very pleased with how my use of equipment developed. I had a multi-camera set up, and used both tripods/gorilla pods and other equipment like dolly's and fig-rigs which helped me develop my skills both as a director and a camera operator. 

Fulfilling multiple roles on this project was a challenge, but one I rose to and I believe was successful in. I presented and matched this with the voice over, while also deciding on the framing of shots. Serving as the director, producer, researcher, presenter, camera operator and editor/graphics designer really helped me develop overall as a videographer. Experiencing what it might be like to work as a freelancer in a professional environment, which is a skill I hope to take forward in to future endeavours. 

In terms of post-production, as an editor I did a successful job on this project, developing the narrative and structure of my video to target an audience in the best ways possible. I was a little disappointed that the editing didn't challenge me in the same way as the last project did. But at the same time, creating informative content that could educate and hold the attention of a young audience was a new and useful experience. 

After showing my cuts to various focus groups of my peers and obtaining their feedback, I was able to incorporate some of my more advanced editing skills. Using video effects like wipes, cuts, zooms etc, that would hold the attention of an audience without distracting them from the informative content.

When it came to the viewing of my rough and fine cuts I found this to be a new and eye opening experience that aided in my own personal development more than anything else. Since the staff weren't film makers or knowledgeable about the industry I didn't expect them to have many points of change. However, they had more criticisms than I imagined. Obviously they had to consider the interests of the museum and it's visitors and whether my film served its informative purpose as efficiently as possible. 

In the past I have really struggled to take on board criticism without feeling slightly offended. However, I am pleased that in this case I was able to see things from there perspective and fully understood why the changes needed to be made. 

I am impressed with my time management skills. I was able to re-shoot some footage and get pick up shots, producing re drafts of my script and voice over, while also finding time to show my work to peers to obtain their feedback. And despite the short deadline I still found time to colour correct my video to aid with the continuity of the multi camera set up. 

Overall this has been a successful and eye opening experience. I am glad I chose this option as it has aided greatly in my personal development and has equipped me with a number of skills that I can now take with me. 

Professional Practice: Final Product

Professional Practice: Final Product


Above is the final video product of my commission for the Guildhall museum. Not much has changed since the fine cut. I have made some colour correction to help with the continuity. As well as extending the final shot by adding additional credits for the Medway council and UCA. 

Monday 11 December 2017

Professional Practice: Skills


Professional Practice: Skills
Key skills I picked up over this unit include: 

Time management- On shoot days I was mainly filming outside so always had to think about light levels and finishing before things got too dark. Otherwise this could have lead to a rushed project with continuity errors.
I also wanted to make sure I allocated myself enough time to cover every angle on my shot list as well as time to review the footage on the day to see if it needed re shooting.
I also planned for time to help people who were also shooting at the guildhall that day and bellow is a picture of a schedule I put together. 

Thinking on My Feet- being adaptable is a skill I’ve worked on in all my units so far and only continued to develop it here. For example I found I couldn’t always be behind the camera and get the movement from the object I wanted, or shoot a PTC with effective panning. As such I asked people like Mellissa to help by either standing behind the camera while I presented or created the desired movement. Or had them hide out of shot moving the fire pump.
Due to overcast conditions on shoot days I had to adjust my settings so that my object could be clearly seen. But I had to find a happy medium between ISO and aperture so as not to have shots appear blown out when panning.
I also had to use separate cuts instead of one continuous shot as changing light levels would have looked ineffective.

Coming prepared with the right equipment- In situations where I didn’t have someone to help I could use a camera with a flip out screen so I could see what was in shot while I manipulated the scene. 

General Equipment use- I was able to further familiarise myself with equipment like the Tascam to provide better audio coverage in some situations. It helped create a nice atmosphere and was useful for recording voice over and back up audio when the shotgun mic cut out.
I was able to put my Dolly and action cam to good use paring it with either a gorilla pod or a tripod head, I shot unique angles that were both effective and stood out from other projects.

Leasing With Clients – With this project I was reminded of the importance of staying in touch with clients. Since most of the paperwork is coming from them and not my tutors it was key to maintain regular contact, exchanging story boards, scripts etc. This way they could see what my aims were and could offer guidance.


Maintaining regular contact also helped when I had questions or sought information about the museum. And when meeting in person I had the opportunity to talk through my aims and ideas with them, helping me to clear up exactly what my intentions and plans were, and allowing them to understand the creative process on a better level.

Thursday 7 December 2017

Professional Practice: Edit Process Part 2

Professional Practice: Edit Process Part 2

After receiving the action points and feedback from the guildhall about my Rough Cut, I was eager to see how I could act upon the changes.


As I mentioned in an earlier post I was concerned about not being able to show of my edit skills which led to the creation of a simple split screen to keep things interesting. However, despite positive feedback from peers, the Guildhall didn't think it was effective. 

As such my first priority was to find a work around for this. After some consideration, i decided to mostly reduce or remove the constant effect of the split screen, and instead opted for a partial brief split screen as the shot transitions. Burrows writes that “Jump cuts, wipes and special effects (…)can be used to create interest and action”.(Thomas D Burrows, 2001, p. 201) So using motion and crop controls I had the next shot in the sequence slide on to the screen and linger for a few seconds before taking over the screen completely. This still allowed for an audience to be intrigued by seeing multiple perspectives at a time but didn't remove concentration. 

In their initial feedback the guildhall expressed a minor concern about the quantity of information delivered. And although I had cut back on this slightly in my re-recorded voiceover, and although this was only a minor point. I still wanted to demonstrate that I had taken on board their feedback. 

Bernard states that Animations and Lower Thirds “help to add information that is not otherwise evident” (Bernard, 2010, p. 207). Taking that on board in this case the best method I found when researching other similar commissions was to have text appear on screen. In order to make sure it wasn't a distraction, I kept the text in the corner to serve as a lower third. 

The next step was to find a place for my pick up shots that were recorded on the second shoot day. I found that the time lapse Alex recorded made a nice cut away at the beginning (something that was lacking before), I added a black and white filter to it as although I had decided against using stock footage, I wanted to give a minor effect of age or recreation to the cut away. 

I was able to blend my now shortened PTC's with the new more effective establishing shots. This gave better pacing to the project and fulfilled the guildhalls request. 

My new voice over fitted quite well. I had to make one or two cuts to give the audience time to process the information I had just given them but over all it flowed well and kept a nice pace. 

Following on from this after discussing with the guildhall abut the best way to help re-enfource the information, they really liked the concept of the animation I had been working on. However, one or two changes had to be made in scale before I could place it in the project. When looking to re-enforce information Thorpe writes that “a diagram aimed specifically for use within projects, could be the right tool for the job” (Thorpe, 2000).

So I began by recreating a diagram of the pump in adobe illustrator and then transferring the shape layers in to After Effects. This proved to be a minor difficulty. Since some of the layers had minor formatting issues and bugged out when transferred to after effects. However I overcame this by re creating the missing shape layers in after effects. Since each layer was its own source I was able to manipulate anchor points, positioning and scale tools to animate each part of the pump individually. 

Then using oval layers and layer masks then copy/pasting animation keyframes, I was able to generate the effect that the pump was blasting water. After working on a a fire animation in a separate document i then transferred it into the same project and exported the entire thing into premier. 

Once in premier I applied a few titles to the animation to further reenforce the point it was making. Although difficult I am very pleased with the outcome of this as it developed skills that i can take forward and the guildhall were very impressed by it, saying it targeted the audience brilliantly. 


Editing for a young target audience was a challenge at first but with the new angles and pans I had obtained from my second shoot day I was able to keep movement in the project to help keep their attention.

Film graduate Christopher Kneller states that “emotional connection with a film can be engrossed with the use of P.O.V” (Kneller, 2013) and the POV shots I incorporated seemed to go down well when I showed them to my peers. aditionally by manipulating the scale of some footage I could create artificial zooms even when my zoom lens wasn't equipped. The shots I used matched the voice over talking points well and maintained a steady pace. 

My final editing steps upon liaising with the guildhall were to add in credits (which included my production logo and the Medway council logo). 


And Although they were happy with the fine cut as it was I took it one step further. Since I had a multi camera set up, I decided to do some colour correcting to make sure there was clear continuity in the project. As well as adding some quiet music towards the end with a few fades before the credits, helping bring the project to a more natural close.


As I mentioned before although the edit has not proved particularly challenging, it has been a great experience working with a specific company's aims and audience in mind. And obtaining/acting upon feedback from a business point of view not a film making one.

Bibliography


Thomas D Burrows, L. S. G. J. C. F. D. N. W., (2001). Video Production Disiplins And Techniques. 8th ed. s.l.:s.n.

Bernard, S. C., (2010). Documentary Story Telling. 3rd ed. s.l.:s.n.

Thorpe, L., (2000). Diagrams and Charts. [Online]
Available at: https://www.liverpool.ac.uk/~cll/lskills/WN/NumeracyDiagrms.html
[Accessed 16 November 2017].

Kneller, C., (2013). Viewer engagement and the advantages/disadvantages of P.O.V shots. [Online]
Available at: https://chrisknellertvblog.wordpress.com/2013/07/23/viewer-engagement-and-the-advantagesdisadvantages-of-p-o-v-shots/
[Accessed 15 November 1017].

Wednesday 6 December 2017

Professional Practice: Fine Cut Viewing And Action Points

Professional Practice: Fine Cut Viewing And Action Points

Today I headed back up to Rochester to meet with the Guildhall and show them the fine Cut I had prepared.

Since the last time we met I had done some additional shooting to get some pickup shots and ensure the narrative of the piece flowed better following their feedback. 

Acting upon their request and advice I reworded my script to make it more universal and appropriate for a younger audience. As such I re-recorded my voice over using a better microphone to ensure it was clearer. 

My pick up shots fitted nicely in to the new edit along with my fully finished animation, which featured animated lines and text to help emphasise the points I make, and ensures the audience don't drown in facts. 

I showed the Guildhall the Fine cut, they watched it through once to get a feel for it, then watched it a second time so that they could stop and comment on bits. 

They were actually very happy with the changes I had made and although some compromises were made in places they could see that I had listened to them. 

They were quite positive towards the project and thought that the shortened PTC's were far more effective than before. They also really liked the finished animation and thought it did its job well. Since the last time I had adjusted the scale to be more realistic and clear, which they picked up on. And although Rachel said she would have still made it slightly smaller, she didn't ask me to change it. 

They liked my revised ending with the transition back to the early shot of the Fire Pump with the text on screen.

Overall they thought the voice over was more effective and the language used was good. They thought the shots blended together very well and the animation felt at home. They actually had very little points to change, the only action points I have are listed below. 


Action Points
Make Sure to Credit UCA at the end.
Extend the final shot and fade it out with the text.
Ensure the Medway Council logo is displayed at the end.

Personal Action Points
Do some minor colour correcting
Insert music at the end
Insert production logo

Tuesday 5 December 2017

Professional Practice: Recording Voice Over

Professional Practice: Recording Voice Over

Since there was a lot of information to convey in this commission I needed an effective delivery method Blumer says ”Film is not a visual medium, it is a story telling medium”. (Blumer, 2010). I knew early on that the best way to convey my intended story in this project would be through the use of voice over. 

Bernard wrote that “narration or voice over if done well can be one of the best methods to move your film along” (Bernard, 2010, p. 205) and from the other commissions I have looked at almost all of them tended to blend voice over and PTC's. This is someting I intended to do in my project. However, I also made sure to record the entirety of my script in case the PTC's didn't work. 

I had recorded an initial take for the rough cut viewing of my project, which although worked, wasn't as effective as it could have been. Additionally, when I met with the guildhall to show them my rough cut they asked me to change some of the language I used which gave unintentional negative connotations. 

Another thing that was raised in that meeting was our target audience. They were able to give a clearer idea of the age of our primary audience (primary school children) Jason Birmingham advises that"When you come to actually recording your voice, try to think of the mic as the ear of your listener"(Birmingham, 2011). As such i wanted to make sure that my voice over was as easy to follow and understand as possible.


So after a script re-write I headed in to the sound booth to re-record the voice over. 

This time I was using a higher quality mic and recording directly in to audition. This provided several advantages, the main ones being that I could instantly play/listen back to the recording to assess it. As well as being able to instantly chop out bits that didn't work. 

On one hand, the recording wasn't as hard as I anticipated since I was reading my own words. 
But on the other hand, the pressure of being in the booth did mean I stumbled or tended to miss out some bits. So in that respect, it wasn't as easy as i had expected. 

However the more I read through and rehearsed the script the more I was able to recite it without needing to pause and look at the paper. 

I recorded multiple good takes so that I could choose which one fitted the best with the edit, and overall this process went smoothly and effectively. 

Bibliography
Bernard, S. C., (2010). Documentary Story Telling. 3rd ed. s.l.:s.n.

Blumer, J., (2010). Documentary Story Telling. 2nd ed. s.l.:s.n.

Birmingham, J., 2011. Producing Professional Voiceovers At Home, Part 1. [Online]
Available at: https://www.blogger.com/blogger.g?blogID=6473802345104068878#editor/target=post;postID=4300072150203277963;onPublishedMenu=allposts;onClosedMenu=allposts;postNum=5;src=link
[Accessed 4 December 2017].

Monday 4 December 2017

Professional Practice: Shoot Day 2

Professional Practice: Shoot Day 2

Today was the second day of shooting, although I didn't initially think I would need a second shoot day, after showing the guildhall my rough cut they asked me to make a few changes that required re-shooting a few bits and getting some pickup shots. 

I had Alex helping me today, primarily as my sound operator but also as an assistant camera operator.

I had with me the revised version of my script so that I could re-record my PTC's as well as a few notes on the pickup shots I needed.  


To start the day we once again wheeled the cart outside, and while the weather conditions were fortunately very similar to the previous shoot day, I had to remember how the cart was placed. 
To overcome this difficulty I had some reference images as well as the rough cut saved to my phone and with Alex's help, we were able to position the cart as close to its original location as possible, helping maintain continuity. 

PTC's
Recording PTC's this time was actually easier since I had already learned the script and actually had less to say to the camera (since the guildhall wanted me to shorten the PTC's). 

I had Alex behind the camera to start with to check I was in focus but then he positioned himself closer to me with the tascam to get as clear audio as possible. 

I like to use manual focus which actually proved as an advantage when I had someone to help. While it was difficult to present and operate a camera at the same time, it is a skill I can take forward.  

I did takes of various length so that i could present the guildhall with different options later on.

Panning
Although most of my panning was done last time I made the mistake of recording some with the incorrect camera orientation. 

As such a re shot a few of the pans from new angles. 

Since I had now reccied the location twice and had shooting experience this proved to be easier the second time around. 

Time Lapses
In some of the commissions I looked at, they featured time lapses of museum visitors. While I wasn't sure if I needed this at first I realised I didn't have many cut aways to ease the initial transition in voice over, so upon Alex's suggestion, I finished my panning shots while he filmed a few time lapses, which upon review, turned out a lot better than expected.  

Other Shots
I continued to get a few more establishing shots since the ones I had, while good, weren't as effective as they could have been. 

Also when watching back my rough cut one thing I picked up on was the length of my POV shots and the lack of cuts. 

To remedy this I recorded some additional POV shots from slightly different angles that I could cut to. 


I also wanted to get a shot of the mechanism inside of the cart but last time found it too dark to prove as an effective shot. However this time I was able to overcome this problem by placing a light just in front of the mechanism to provide a well lit shot.

Overall today was very productive and I have multiple options for editing that will benefit both myself and the guildhall. 

Difficulties
The outside location proved to be quite noisy when recording PTC's but to overcome this we did multiple takes.

Some of the angles of the pump were darker than others and raising ISO would have made the shot too grainy. to overcome this I placed a light out of shot but kept the intensity low to maintain a natural look.

The location of the pump had to be re established. I could remember roughly the angel it was positioned at last time but to help me I had reference images to properly asses the space with and maintain continuity. 


Positives
My communication skills were effective today, Alex raised more questions than Mellissa and I effectively explained my creative vision.

I came away once again with more footage than initially planned.

I reviewed the footage far more frequently this time around and because of that I was able to quickly identify which shots were most effective and which needed to be re-shot. 

I stuck to my schedule far better the second time, probably since I had a clearer idea of what I needed.

Friday 1 December 2017

Professional Practice: Shot Types

Professional Practice: Shot Types

As part of my ongoing research for this project, I have been looking in to various shot types and shooting styles used in commissions. This is a collation of what I have found. It is expanded upon from the research in my report.


Establishing Shots

One type of shot that was present in all of the commissions I looked at (including previous students work) was the Establishing Shot. Merriam Webster describes an establishing shot as “a usually long shot in film or video used at the beginning of a sequence to establish an overview of the scene that follows”. (Webster, 2015)

Bernard states “within any given scene you want establishing shots, wide shots, medium shots, close ups, and cut aways”. (Bernard, 2010, p. 177) I found establishing shots in particular to be key in showing the audience where the events are set and gives some kind of context. I use several establishing shots especially when starting a new point in the voice over.

The first establishing shot helps give context to the following Piece to camera by setting the location, I used the museum sign as Iconography so that you can get some context as to the location I am referring to.

The second use of establishing shots is used to show the Fire Pump in its entirety and helps to help remind the audience of the subject In addition to the establishing shots I followed Bernards advice by shooting several wide shots, since in the past I’ve needed to re-shoot a scene and have not had enough wide shots, as such I have learned to get good shot coverage.


Pans/Tracking Shots


When planning this commission I knew that there would be times when the younger target audience's attention might be reduced as they become slightly bombarded with information. As such I knew I had to keep the visuals of the shot interesting. Lynda.com refers to panning as a direct method of manipulating audience attention, stating “Panning can be used to follow a subject as it makes its way across the frame. Or it can be also used to redirect the viewer's attention to reveal new details”. (Angel, 2015) Meaning that we can see everything that is going on in a shot as if we ourselves were there following the action. I knew it was important to keep movement in the piece and had multiple panning methods.

The first was a traditional horizontal movement with the camera mounted on the tripod.
Then through looking at other commissions such as the Middelheim Museum promo, I noted that they blended tripod and handheld movement to make it feel like the video was constantly on the move. Picking up on this I used the fig rig to get closer than I could with a tripod moving along the object to direct audiences eye line.
My final method of panning/tracking was using my mini dolly. I know from research that low angle shots give the subject power so I used a series of low angle pans (from both the front and side to find the best option) to keep audiences in awe of the object and maintain attention.
The area I had to work with wasn’t ideal for this since the concrete ground was uneven and didn’t provide steady footing. However I overcame this by utilising the smooth planks and pillars around me as an anchor point.
Point Of View Shots (POV)
Another use of movement came thanks to the action cam and a gorilla pod. I was able to mount the camera on to the moving parts of the pump to create POV shots, as if the audience were actively engaged in its motion. Media Collage.com defines a POV shot as “A shot that shows a view from a certain perspective” (Collage, 2013).
Film graduate Christopher Kneller states that “emotional connection with a film can be engrossed with the use of P.O.V” (Kneller, 2013) which is one of the main reasons I decided to employ the technique. I wanted my audience to connect with the story and that is one method of doing so.
I received positive feedback about these shots and they seemed to do their job well.

Zoom Shots

Jackobs and Peacock write that “The zoom lens is the ideal tool to keep continuity, while keeping action on screen at all times” (Jason Jackobs, 2013).


I knew I wanted to maintain audience attention as previously mentioned by keeping the movement on screen. Zoom tools were another method of this. I used a larger lens on occasion in my project to allow for me to zoom in on particular focus points, or out to re-establish the subject. However, upon reflection I didn't utilize this technique as often as I could have done and as such had to manipulate some shots in post to create this effec
t.